Block Printing
Exhibition: Women X Women
Artist: AFA Permanent Collection - Various Artists
Overview
No matter who we are, whether we are an artist, a mathematician, a basketball player, a storyteller, a student, a daughter or perhaps a brother, we all have important influences in our life that inspire us. Artists are inspired by the people around them as well as largely by other artists, learning by looking at specific works and techniques. In the Women X Women exhibition, all of the artists are women and all of their works are inspired by women and use them as their subjects. They also all use a variety of different styles and techniques to create their works.
For this project, participants will be looking at the technique used in Dana Shukster’s These Faces I Give To The World, Self Portrait to create their own block-printed portrait of a female subject that inspires or influences them.
Objectives
Reflect and research a female person of influence
Be introduced to basic block-printing techniques
Learn to distinguish between negative and positive space while working in relief
Develop fine motor skills
Materials
Lino Printing Block 4 x 6 (Speedball makes a easy-carve flexible block which is soft and smooth making it easy for participants to carve)
Water-based Printing Ink or acrylic paint
Carving tool
Smooth Cardstock, multiple pieces
Printer paper
Brayer
Flat tray for ink or paint
Pencil
Sharpie Pen
Scratch-Foam Board or Foam plates (for younger participants)
Mark making tools (for younger participants)
Instructions:
Step One
Take time to reflect and choose a female subject that inspires you. If possible, have a reference photo to draw from.
Step Two
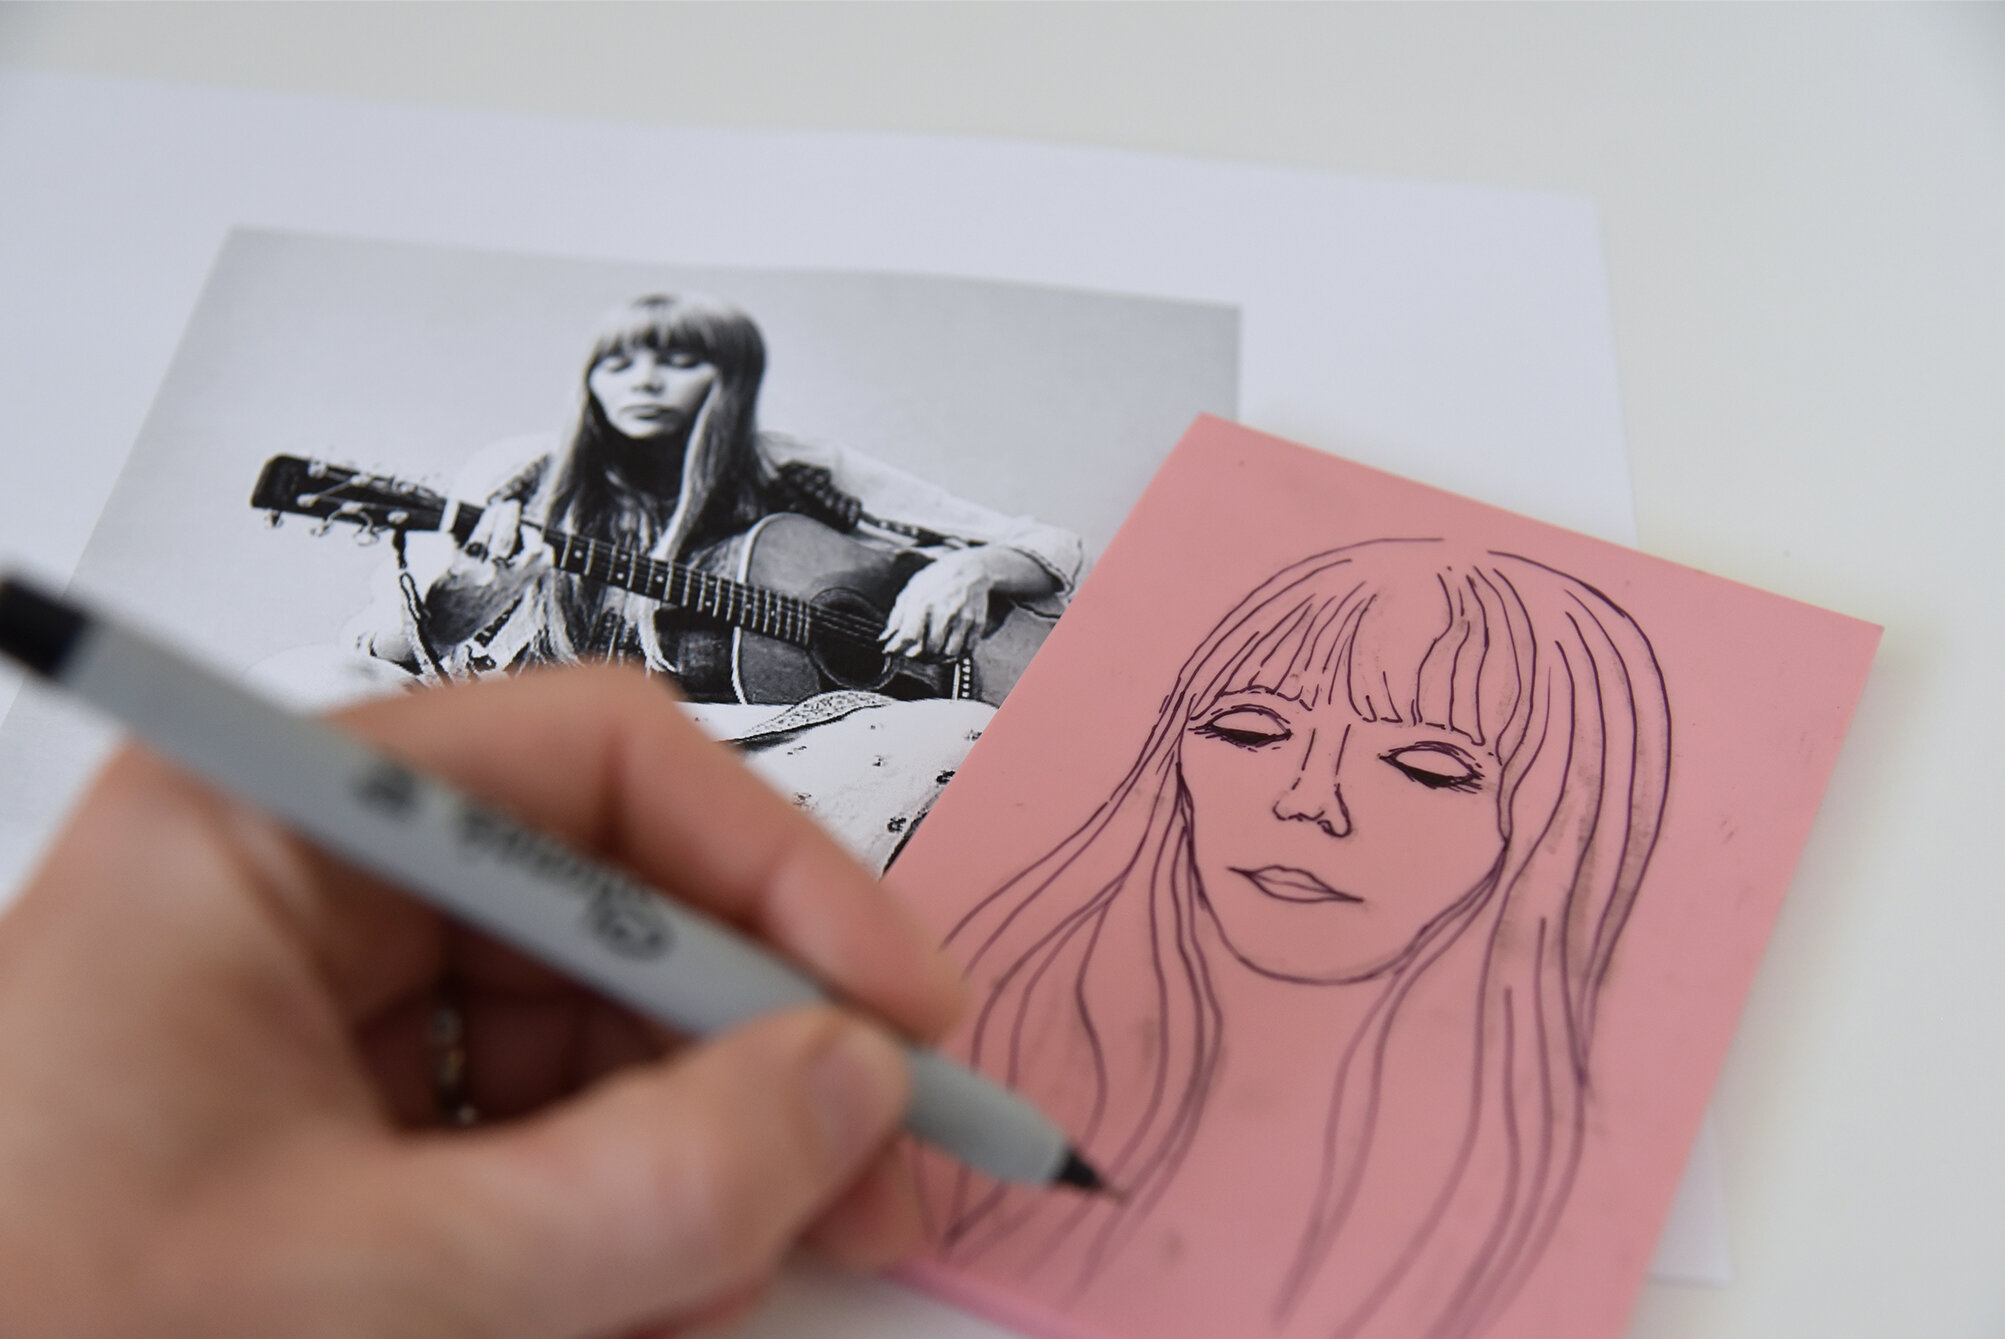
Take your Lino block and use it to trace an outline on a piece of paper. Use this as a template and size reference to draw your portrait or design. Once your drawing is complete, line the paper on top of your Lino block, drawing side down, and rub to transfer your design on to the block. To prevent the pencil guides from rubbing off while you are working, take a pen and trace. You will notice your design was flipped horizontally during the transfer. Once you print your block on paper, your design with flip back to its original reflection.
Draw over the pencil lines on the lino with a Sharpie pen.
Step Three
Carefully visualize your design and the negative space remembering that the areas you carve away will be white in your final print and the block still remaining is where the ink will sit.
Using your carving tool, follow your pencil lines as a guide and cut in to the block. Cut alongside the pen lines to leave them raised. Work slowly and thoughtfully to ensure you are considering negative and positive space and cutting away the correct areas. Carefully control the angle of the tool. Holding it at a steep angle makes a deep cutting edge while a shallow angle brings the cutting edge up.
Start by cutting less. You can always cut more later, but can’t add once it’s been taken away.
Always remember to cut away from yourself and keep your non-carving hand (which will be holding the block) behind the carving tool.
Step Four
Once carving is complete you are ready to ink your block. Put a small spoonful amount of ink/paint on to your flat paint tray. Take your brayer and roll the ink around until the ink is smooth and the brayer rolls easily. Once the brayer is loaded evenly with ink, roll the brayer ton to your block ensuring a smooth even coating. If you use too much paint it will begin to fill the carved areas of your block and you will loose some detail.
Step Five
Take a sheet of smooth printing paper and carefully position it on top of your block. Rub in circles to transfer ink evenly. Remove paper and hang your print to dry. Re-ink your block and repeat if you are making multiple prints.
Step Six
You are now ready to sign, title, and edition each of your prints. In pencil, sign your name at the bottom of the image on the right hand side, title your piece at the bottom of the image in the middle and mark the edition number on the bottom of the image on the left. Editions are labelled with the particular print number then a slash (/) then the number of total prints in the edition.
Ie. 1/5
Print number 1, from a total of 5 identical prints
Variations
Block printing originated in China dating back to before 220 AD. The carvings were created on woodblocks and used as a method for printing on textiles. After you have tested your printing block on paper, try printing on cloth.
While older participants will enjoy the challenge of translating a detailed, representational drawing into a carving, younger participants can explore the medium by carving simple patterns and designs.
If participants are not age appropriate to use carving tools, you may have them use scratch foam board or styrofoam plates and explore mark making to indent the foam and create a design. Be sure they are indenting deep enough to allow for a successful transfer.


